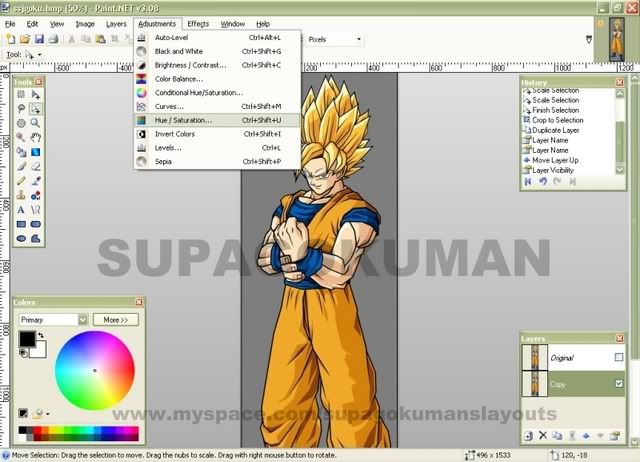
1. Ok first you need to load your image.
2. Then make a copy of the image by using the copy layer button in your layer box.
3. Then make the top copy of the pic invisible by unchecking the box next to it.
EXAMPLE
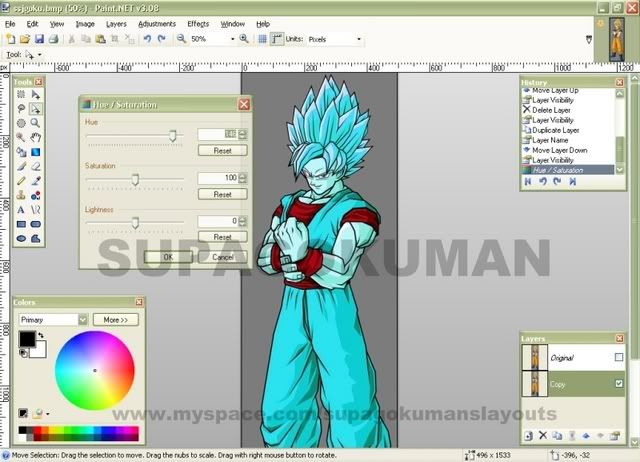
4. Then go up to adjustments and go to hue/saturation and make the image the color you want.
EXAMPLE
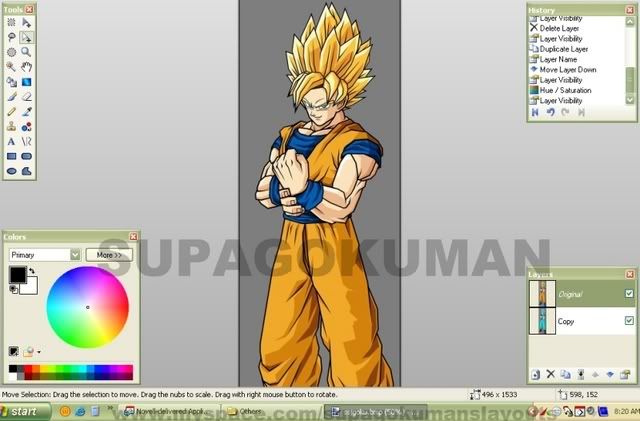
5. Now that you have the color you want, make the top layer visible again.
EXAMPLE
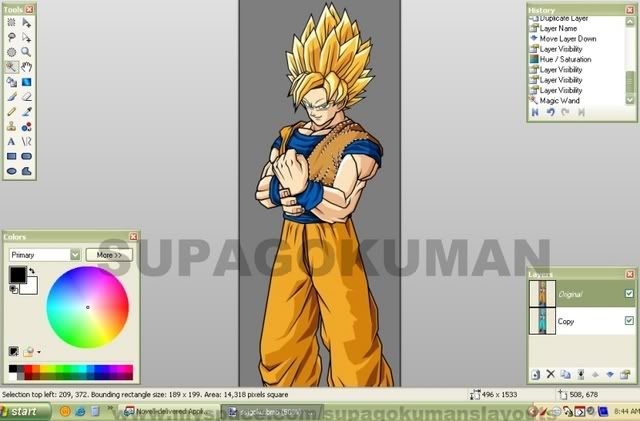
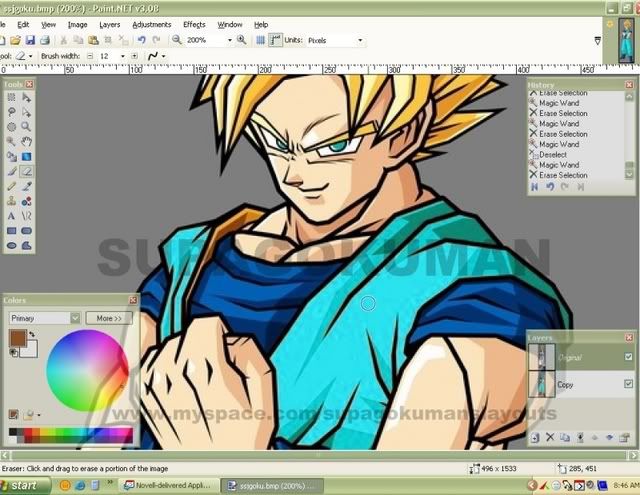
6. Now go over to your tools on the left and select the magic wand. You can adjust how much area the wand will select by adjusting the tolerance bar on the top toolbar.
7. Now pick the color you want to cut out. In this case I'm cutting out the orange in Goku's outfit so the bluegreen will show through. Just highlight the area with the wand and hit the delete button on your keyboard.
EXAMPLE
(If you miss some color or just can't get the wand to work, use the eraser on the top layer. You can adjust the size of the eraser in your top toolbar.)
EXAMPLE
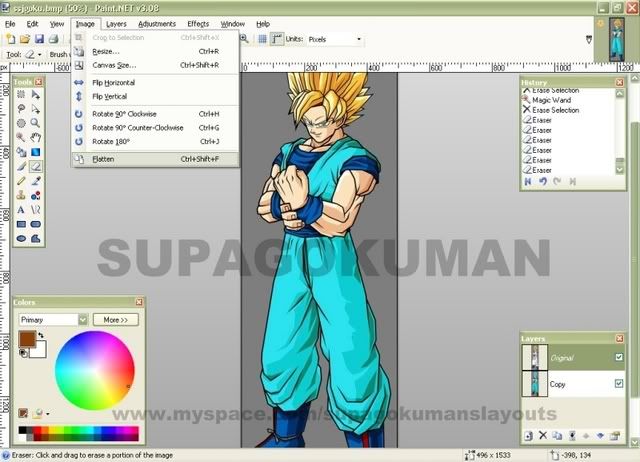
8. Now flatten the 2 layers.
EXAMPLE
(Also, when you are done with a pic edit, always make sure the you flatten all you layers. And be sure to save your file as a .png or .jpg file type or sites like photobucket and myspace may not let you upload your pic)
Search

Custom Search
About Me
- SUPAGOKUMAN
- Hobbies are watching anime, playing video games and making myspace graphics.